Thursday, November 25, 2021

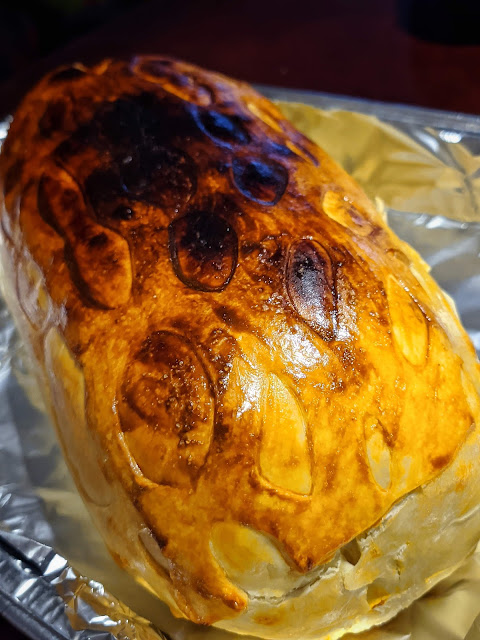
Beef Wellington


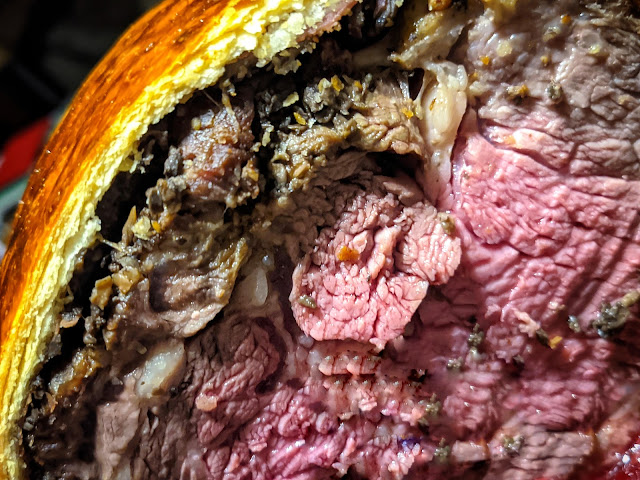
My first Beef Wellington.  A lot of work, not 72-hour effort like the 2nd video below, but, it took me 2 days to get it done.

A couple of tips:

  • You would need a lot of mushroom.  I bought two packs of mushroom and it should cover the beef just fine.  It just took a long time to dry the mushroom in a pan.
  • I made my own crispy puff pastry.  Please see the crispy skin from my Shanghai Savory Mooncakes.  I think a store-bought would have been easier.

Despite my sore back after long hours of standing in the kitchen, the beef was very juicy, the mushroom was very tasty and the skin was very crispy.  Overall, my Beef Wellington was well received!

Youtube:

Beef Curry (牛肉咖哩)


My first beef curry.  I followed the recipe from the video below with some modifications:

  • I used none of the mushrooms simply because I didn't have any.  Instead, I used potato which I had plenty on the Thanksgiving day.
  • I also didn't use any apple at all because I didn't have any.
  • I used, however, a small piece of dark chocolate, because that was all I had left.
Nevertheless, the curry tasted yum still!

Youtube:

Friday, November 19, 2021

Partial Lunar Eclipse, Nov 18-19, 2021


As of this writing, I have been watching the Partial Lunar Eclipse from the youtube live streaming from Griffith Observatory on Nov 18, 2021 @ 10pm PST.  The whole process would last for 6 hours and the moon was at its minimal at 1:03am.  The eclipse was partial because only 97% of the moon was covered by the earth.

I tried to take some pictures myself; however, nothing turned out good.  For fun, I started doing screen captures from the youtube live stream video over time and put them together.  I think it would be a very cool virtual background.  Feel free to use it.  The credits go to Griffith Observatory.  Enjoy!

Youtube:

Tuesday, November 16, 2021

Ramen Eggs (Ajitsuke Tamago/Ajitama/日式溏心蛋)


Ajitama is boiled eggs marinaded in a sauce and is one of the very popular toppings for Japanese ramen.  I especially like those with soft center to a degree that the egg yolk is almost runny.

The youtube video below shows how the traditional ramen eggs are made.  As usual, I'd like to make some adjustments:

  • I'd add some salt and vinegar in the boiling water right before boiling the eggs.  I believe this would soften the egg shell so that it would be easier for me to peel the eggs later.
  • The length to boil the eggs is very crucial.  Depending upon the size of the eggs, I usually boil them for 5 and 1/2 to 6 minutes, straight from the fridge and after poking a hole in the base of the egg.
  • After peeling the eggs, instead of making the sauce like in the video, for my own recipe, I like to use the Brown Braising Sauce.  I don't use the braising sauce just for the eggs.  Instead, I would braise some pork belly or pork legs first.  After taking out the pork belly or pork legs, while still hot, I would submerge the boiled eggs into the sauce and let them absorb all the flavors for at least 4 hours before eating.  It's that easy!
  • For each batch, I usually make a dozen of eggs, and for sure, I wouldn't be able to finish them all on the same day.  I would store them in the fridge.  Whenever I want to consume them again, I would take a couple out from the fridge, put them in the microwave, dial down the microwave's power to only 50%, heat the eggs for 30 seconds, flip the eggs, and do the same heat settings for another 30 seconds.  After that, the eggs would be warm, yet, the yolks won't be over cooked.
Those ramen eggs are to die for.  Enjoy!

Youtube:

Sunday, November 14, 2021

Sweet/Glutinous Rice Wine (甜/糯米酒)

Final product: 2 jars of sweet rice wine and 1/2 jar of fermented glutinous rice!

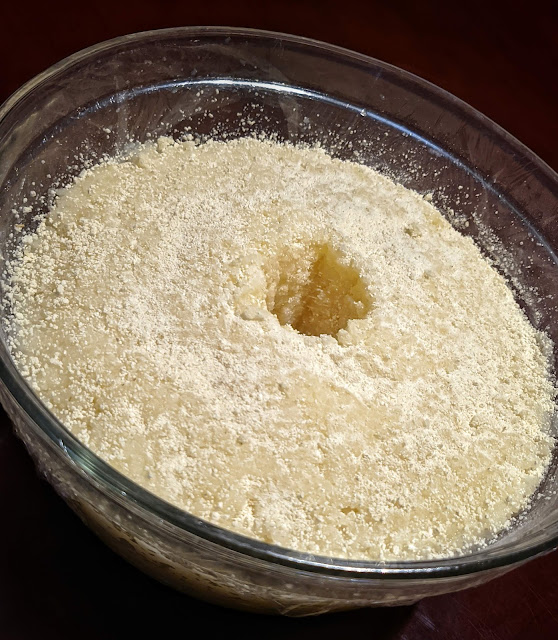
Day 1.  Mixed the rice (cooked and in room temperature) with the yeast ball and laid the rice mixture in a glass bowl.  Made a hole in the middle for the ease of observation.   Covered the bowl with the food wrapper.

Day 2.  The hole was filled with liquid.  A good sign.

Day 3.  The rice floated on top of the liquid.

Day 4.  I transferred the mixture into a jug.  Covered the jug with an airlock.

Day 11, the rice wine was finally ready.  I filtered out the fermented rice which was stored in a mason jar.  The rice wine was then stored in two different 500ml mason jars.  After that, I steamed the 2 mason jars for 20 minutes.  When the jars cooled down, I stored them in the fridge.


I have been making red wine from the store bought grape juice at home for years.  My co-workers constantly joked that I was making moonshine.  I don't care; it's inexpensive to make and fun to do.  I'll blog about that next time.

Two weeks ago, I was in a local Asian supermarket and ran into the yeast balls.  I'd been long for trying to make rice wine.  So, I bought a package, and the journey began.

Before that, I researched about how the yeast balls worked.  Expectedly, the science behind them was beyond my comprehension.  In a nut shell, the yeast balls have two functions: during the rice wine making process, the yeast balls first break the starches into sugar, then sugar into carbon dioxide and ethanol (or alcohol). Carbon dioxide would escape into the air, the liquid would be the rice wine and the sediment would be the fermented rice.

Enough with the research, here came the fun part.  I measured 2 cups of glutinous rice, washed them throughly.  Instead of soaking them for hours or over night then steaming them, I cooked them in a rice cooker.  When the rice was done, I rinsed it with cold tap water.  Then, I took out two yeast balls, crushed them into powder, mixed them with the rice.  In retrospect, I should have used only one yeast ball or less.  After that, I laid the rice mixture in a glass bowl, added some filtered water and made a hole in the middle.  The hole was for me to observe if there was any wine in the making.  Sure enough, I could see some liquid in the hole 24 hours later; I was very excited.

By the 3rd day, I could see a lot of liquid at the bottom of the bowl.  I knew the second stage of the rice wine making process was about to begin.  On the 4th day, I transferred the rice mixture into an empty one-gallon jug, which had been laying around in my house, and topped that jug with an airlock.  Apparently, the jug was bigger than it should.  Regardless, in the next few days, I could see the bubbling in the jug and the airlock was going up and down.  11 days later, the airlock was almost motionless, like moving once a minute.  From my past experience of making moonshine, I knew my rice wine was ready.

I filtered out the fermented rice, stored it in a mason jar and stored the jar in the fridge.  I'll use the fermented rice to make the Egg Drop Soup again in the future.  I then poured the rice wine into two different mason jars.  After that, I steamed the mason jars for about 20 minutes.  Viola, my first home-made sweet rice wine.

Last but not least, one last reminder: during the rice wine making process or any wine making process, all the equipments, for example, the bowl, jug, spoon, mason jars, etc, need to be sterilized throughly.  I did it with pouring boiling water on them before use.  Otherwise, if a tiny bit of bad bacterial gets into the fermented rice, it would spoil the whole bunch.

Youtube:
Saturday, November 13, 2021

Fermented Rice & Egg Drop Soup (酒酿/醪糟蛋花湯)


Fermented rice is what's left after the rice wine fermentation process.  In a nut shell, during the rice wine making process, the yeast balls break the starches into sugar, then sugar into carbon dioxide and ethanol (or alcohol).  Carbon dioxide would escape into the air, the liquid would be the rice wine and the sediment would be the fermented rice.

I'll write about the rice wine in another blog.  Here, we don't want the fermented rice goes to waste.  For that, it's common for Chinese people to cook egg drop soup, poached egg soup, or rice ball soup with the fermented rice.

Youtube:

Friday, November 12, 2021

Chinese Tea Leaf Eggs (茶葉蛋/茶叶蛋)


Tea leaf egg or simply tea egg is a typical Chinese savory food, commonly sold as a snack.  The eggs are boiled with spices and, of course, with red/black tea, hence the name tea eggs.

I followed mainly the first video below, although I used a regular stove pot instead of a rice cooker, 5-spice instead of those ingredients and tea bags instead of tea leaves in the video.  After soaking overnight in the tea liquid, the eggs were imprinted with very nice looking marble patterns.  The eggs were very tasty as well.

Youtube:

Saturday, November 6, 2021

Black Pepper Beef (黑椒牛柳)


I bought some Beef Loin Tri Tip Steak from Costco today, was thinking to pan fry some steaks, but decided to make Black Pepper Beef in the last minute.  I went a little too far with the black pepper; fortunately, it turned out fine.  Also, I realized I didn't have broccoli, so, I used cauliflower instead.  The color wasn't the greatest, but, the Black Pepper Beef tasted awesome.

I mainly followed the recipe from James's video (the 1st video), but, it was Chinese-only and didn't have caption.  I included a second one below for non-Chinese speakers.  It wasn't the same, but, looked good too.

Youtube videos: