Sunday, December 26, 2021

Taiwanese Popcorn Chicken (台式鹽酥雞)


Popcorn chicken is a popular street snack in Taiwan.  It consists of bite-sized pieces of marinated chicken, coated with sweet potato starch, and deep fried.  After that, they are topped with salt, pepper and sichuan peppercorn powder.  Usually but optionally, the chicken is paired with lightly fried basil leaves.

Today, I completely forgot about the basil leaves.  Nevertheless, they still tasted great.  Yum!  Yum! 

Youtube:

Thursday, November 25, 2021

Beef Wellington


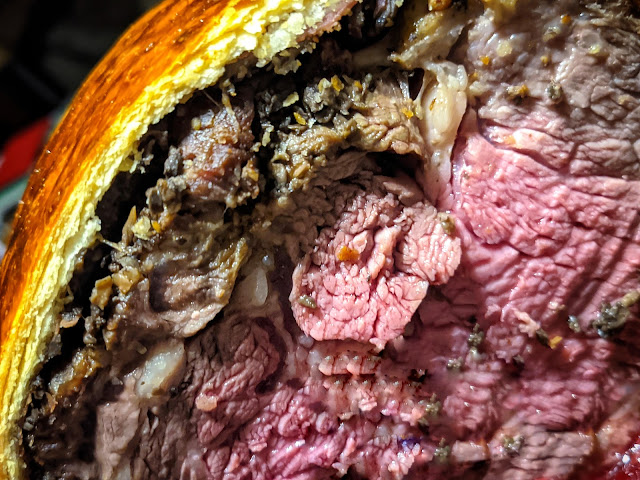
My first Beef Wellington.  A lot of work, not 72-hour effort like the 2nd video below, but, it took me 2 days to get it done.

A couple of tips:

  • You would need a lot of mushroom.  I bought two packs of mushroom and it should cover the beef just fine.  It just took a long time to dry the mushroom in a pan.
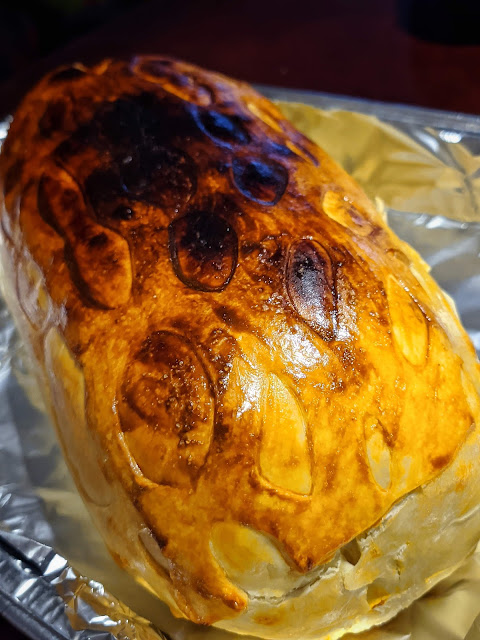
  • I made my own crispy puff pastry.  Please see the crispy skin from my Shanghai Savory Mooncakes.  I think a store-bought would have been easier.

Despite my sore back after long hours of standing in the kitchen, the beef was very juicy, the mushroom was very tasty and the skin was very crispy.  Overall, my Beef Wellington was well received!

Youtube:

Beef Curry (牛肉咖哩)


My first beef curry.  I followed the recipe from the video below with some modifications:

  • I used none of the mushrooms simply because I didn't have any.  Instead, I used potato which I had plenty on the Thanksgiving day.
  • I also didn't use any apple at all because I didn't have any.
  • I used, however, a small piece of dark chocolate, because that was all I had left.
Nevertheless, the curry tasted yum still!

Youtube:

Friday, November 19, 2021

Partial Lunar Eclipse, Nov 18-19, 2021


As of this writing, I have been watching the Partial Lunar Eclipse from the youtube live streaming from Griffith Observatory on Nov 18, 2021 @ 10pm PST.  The whole process would last for 6 hours and the moon was at its minimal at 1:03am.  The eclipse was partial because only 97% of the moon was covered by the earth.

I tried to take some pictures myself; however, nothing turned out good.  For fun, I started doing screen captures from the youtube live stream video over time and put them together.  I think it would be a very cool virtual background.  Feel free to use it.  The credits go to Griffith Observatory.  Enjoy!

Youtube:

Tuesday, November 16, 2021

Ramen Eggs (Ajitsuke Tamago/Ajitama/日式溏心蛋)


Ajitama is boiled eggs marinaded in a sauce and is one of the very popular toppings for Japanese ramen.  I especially like those with soft center to a degree that the egg yolk is almost runny.

The youtube video below shows how the traditional ramen eggs are made.  As usual, I'd like to make some adjustments:

  • I'd add some salt and vinegar in the boiling water right before boiling the eggs.  I believe this would soften the egg shell so that it would be easier for me to peel the eggs later.
  • The length to boil the eggs is very crucial.  Depending upon the size of the eggs, I usually boil them for 5 and 1/2 to 6 minutes, straight from the fridge and after poking a hole in the base of the egg.
  • After peeling the eggs, instead of making the sauce like in the video, for my own recipe, I like to use the Brown Braising Sauce.  I don't use the braising sauce just for the eggs.  Instead, I would braise some pork belly or pork legs first.  After taking out the pork belly or pork legs, while still hot, I would submerge the boiled eggs into the sauce and let them absorb all the flavors for at least 4 hours before eating.  It's that easy!
  • For each batch, I usually make a dozen of eggs, and for sure, I wouldn't be able to finish them all on the same day.  I would store them in the fridge.  Whenever I want to consume them again, I would take a couple out from the fridge, put them in the microwave, dial down the microwave's power to only 50%, heat the eggs for 30 seconds, flip the eggs, and do the same heat settings for another 30 seconds.  After that, the eggs would be warm, yet, the yolks won't be over cooked.
Those ramen eggs are to die for.  Enjoy!

Youtube:

Sunday, November 14, 2021

Sweet/Glutinous Rice Wine (甜/糯米酒)

Final product: 2 jars of sweet rice wine and 1/2 jar of fermented glutinous rice!

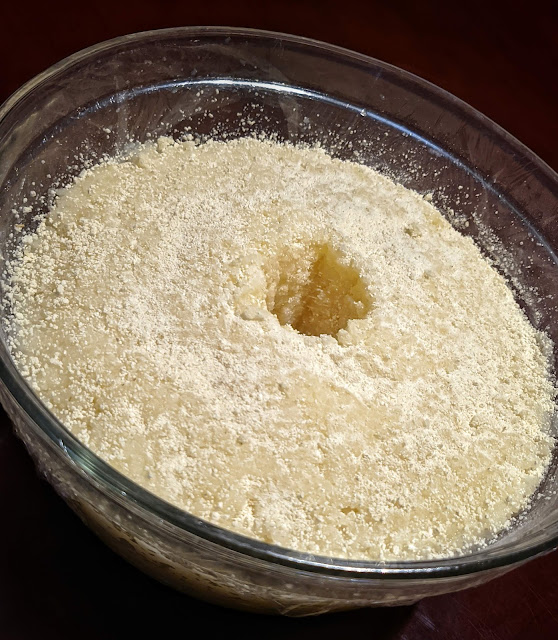
Day 1.  Mixed the rice (cooked and in room temperature) with the yeast ball and laid the rice mixture in a glass bowl.  Made a hole in the middle for the ease of observation.   Covered the bowl with the food wrapper.

Day 2.  The hole was filled with liquid.  A good sign.

Day 3.  The rice floated on top of the liquid.

Day 4.  I transferred the mixture into a jug.  Covered the jug with an airlock.

Day 11, the rice wine was finally ready.  I filtered out the fermented rice which was stored in a mason jar.  The rice wine was then stored in two different 500ml mason jars.  After that, I steamed the 2 mason jars for 20 minutes.  When the jars cooled down, I stored them in the fridge.


I have been making red wine from the store bought grape juice at home for years.  My co-workers constantly joked that I was making moonshine.  I don't care; it's inexpensive to make and fun to do.  I'll blog about that next time.

Two weeks ago, I was in a local Asian supermarket and ran into the yeast balls.  I'd been long for trying to make rice wine.  So, I bought a package, and the journey began.

Before that, I researched about how the yeast balls worked.  Expectedly, the science behind them was beyond my comprehension.  In a nut shell, the yeast balls have two functions: during the rice wine making process, the yeast balls first break the starches into sugar, then sugar into carbon dioxide and ethanol (or alcohol). Carbon dioxide would escape into the air, the liquid would be the rice wine and the sediment would be the fermented rice.

Enough with the research, here came the fun part.  I measured 2 cups of glutinous rice, washed them throughly.  Instead of soaking them for hours or over night then steaming them, I cooked them in a rice cooker.  When the rice was done, I rinsed it with cold tap water.  Then, I took out two yeast balls, crushed them into powder, mixed them with the rice.  In retrospect, I should have used only one yeast ball or less.  After that, I laid the rice mixture in a glass bowl, added some filtered water and made a hole in the middle.  The hole was for me to observe if there was any wine in the making.  Sure enough, I could see some liquid in the hole 24 hours later; I was very excited.

By the 3rd day, I could see a lot of liquid at the bottom of the bowl.  I knew the second stage of the rice wine making process was about to begin.  On the 4th day, I transferred the rice mixture into an empty one-gallon jug, which had been laying around in my house, and topped that jug with an airlock.  Apparently, the jug was bigger than it should.  Regardless, in the next few days, I could see the bubbling in the jug and the airlock was going up and down.  11 days later, the airlock was almost motionless, like moving once a minute.  From my past experience of making moonshine, I knew my rice wine was ready.

I filtered out the fermented rice, stored it in a mason jar and stored the jar in the fridge.  I'll use the fermented rice to make the Egg Drop Soup again in the future.  I then poured the rice wine into two different mason jars.  After that, I steamed the mason jars for about 20 minutes.  Viola, my first home-made sweet rice wine.

Last but not least, one last reminder: during the rice wine making process or any wine making process, all the equipments, for example, the bowl, jug, spoon, mason jars, etc, need to be sterilized throughly.  I did it with pouring boiling water on them before use.  Otherwise, if a tiny bit of bad bacterial gets into the fermented rice, it would spoil the whole bunch.

Youtube:

Saturday, November 13, 2021

Fermented Rice & Egg Drop Soup (酒酿/醪糟蛋花湯)


Fermented rice is what's left after the rice wine fermentation process.  In a nut shell, during the rice wine making process, the yeast balls break the starches into sugar, then sugar into carbon dioxide and ethanol (or alcohol).  Carbon dioxide would escape into the air, the liquid would be the rice wine and the sediment would be the fermented rice.

I'll write about the rice wine in another blog.  Here, we don't want the fermented rice goes to waste.  For that, it's common for Chinese people to cook egg drop soup, poached egg soup, or rice ball soup with the fermented rice.

Youtube:

Friday, November 12, 2021

Chinese Tea Leaf Eggs (茶葉蛋/茶叶蛋)


Tea leaf egg or simply tea egg is a typical Chinese savory food, commonly sold as a snack.  The eggs are boiled with spices and, of course, with red/black tea, hence the name tea eggs.

I followed mainly the first video below, although I used a regular stove pot instead of a rice cooker, 5-spice instead of those ingredients and tea bags instead of tea leaves in the video.  After soaking overnight in the tea liquid, the eggs were imprinted with very nice looking marble patterns.  The eggs were very tasty as well.

Youtube:

Saturday, November 6, 2021

Black Pepper Beef (黑椒牛柳)


I bought some Beef Loin Tri Tip Steak from Costco today, was thinking to pan fry some steaks, but decided to make Black Pepper Beef in the last minute.  I went a little too far with the black pepper; fortunately, it turned out fine.  Also, I realized I didn't have broccoli, so, I used cauliflower instead.  The color wasn't the greatest, but, the Black Pepper Beef tasted awesome.

I mainly followed the recipe from James's video (the 1st video), but, it was Chinese-only and didn't have caption.  I included a second one below for non-Chinese speakers.  It wasn't the same, but, looked good too.

Youtube videos:

Saturday, October 30, 2021

Taiwanese Sesame Oil Chicken (麻油雞)


Taiwanese Sesame Oil Chicken, not to be confused with the Sesame Chicken, is a popular dish in Taiwan especially for new moms and during the Winter.  It's made of chicken, sesame oil and Taiwanese rice wine.  I used a recipe from a youtube video which also used goji berries.  That was a Chinese-only video though.  For non-Chinese speakers, I also included a second video which was close to how I made it.

Because I used the cooking rice wine which contained a little salt already, I didn't use any salt at all for this dish.   Additionally, because of its low alcohol content, my dish didn't flame up as in the video.  Last but not least, I used my cast iron the whole time without the need to switch from a wok to a pot.  Despite all that, the soup was surprisingly yummy and it warmed up my whole body.  Nice!

Youtube:

Monday, October 18, 2021

Ginger Scallion Lobster (蔥薑爆炒龍蝦)


This is my first Ginger Scallion Lobster.  In fact, this is my first lobsters for a very long time.  

If you are like me, don't want to or don't know how to deal with live lobsters, feel free get some lobster tails from Costco or any online stores such as Amazon.

Here are some tips:
  • Since I was making this at home, I used less oil and fried the lobsters in batches.
  • Be sure to use hot water instead of cold water at the end; otherwise, by the time the water was boiled, the lobster would be over cooked.
The end result is very tasty and tender ginger scallion lobsters.  Yum!

Youtube:


Sunday, October 17, 2021

Stir-fried Tomato and Egg (番茄炒蛋)


My family and I love stir-fried tomato and egg, and it's very easy to make.  This is one of those which was passed down to me verbally.  There are also many youtube videos available, so I just pick one that closes to how I usually make it.

I, however, have several tricks to share:

  • My first trick is to add salt or garlic salt in the eggs and sugar in the tomato, then mix them together.  Adding sugar in the tomato makes it easier to balance the sourness and sweetness.  This also results more layers in the taste at the end.
  • Another trick is the order how I cook it.  I usually stir-fry eggs first and tomato second.  This way, I don't need to wash the pan between cooking the eggs and tomato.
  • Last but not least, when stir-frying the eggs, I only cook them for about 70% done, then pour them on a plate.  Then, using the same pan, I start cooking tomato as mentioned above.  After seasoning the tomato, I add the eggs back to the pan and mix them with the tomato, and finish cooking the eggs there.  This way, the eggs won't be over cooked.

Youtube video:

Saturday, October 16, 2021

My First Banana Bread


This is my first banana bread and my first non-youtube recipe.  I used the less sweet recipe, ie. 1/2 cup of sugar instead of 3/4 cup.  The bread was still very good, especially when it was still hot.  Now, the pictures make me want to start my 2nd.  Lol.

Recipe:

Friday, October 15, 2021

Pan fried Salmon


Salmon from Costco, cut into smaller pieces, added some salts and black peppers, pan fried with butter, medium rare.  Crispy outside, soft inside.  Very tender and tasty!

Thursday, October 14, 2021

Cast Iron Rice (or Clay Pot Rice or 煲仔飯)


Clay Pot Rice, as its name suggests, is usually cooked with clay pots.  Mine was broken years ago, so, I used my combo cooker (a cast iron) instead, hence, the name Cast Iron Rice :)

The readers should know me by now, I don't usually follow the recipes to the letter.  There is no exception in this case as well.  The top 2 pictures above, I used Chinese sausages, and the 3rd one I used a pack of Italian sausage from Costco.  In other occasions, I used Costco rotisserie chicken (yes, cooked), pork (also cooked) or any leftover meats (yes, also cooked) in my fridge.

I like Cast Iron Rice (or Clay Pot Rice) because it has rice, meats, veggies and I often crack a couple of eggs as well.  The cooking usually takes about 20 minutes.  I don't usually bother to soak the rice in water  in advance because I enjoy harder rice better.  The first 10 mins is the time to cook the rice.  During which, I usually prepare the sauce, veggies, slice the meat or debone the chicken.  After that, I add all the ingredients into the plot, wait for another 10 minutes.  That's it.  It even has the burned rice at the bottom.  

It's a quick and predictable way of having a nice meal during a hectic day.

Wednesday, October 13, 2021

Liangpi (Cold Skin Noodle or 凉皮)


Liangpi literally means cold skin, but, it's made from wheat or rice flour.  Despite its name, it is served all year round and very popular in China.

In a nut shell, the whole process took about 5 to 6 hours, mainly waiting for the gluten separated from the starch.  Again, I bought the chili sauce from a local asian supermarket or online to make things a little easier.  Also, I didn't usually follow the recipe to the letter; I used whatever veggies I had left in the fridge, in this case, green peppers and carrots instead of cucumbers.

Youtube:

Tuesday, October 12, 2021

Cantonese-style Chang Fen (腸粉)


Instead of mixing the rice flour, wheat/tapioca starch and potato starch, I bought several ready to use mixed flour packages from a local asian supermarket.  For the rest, I followed the instructions from the youtube video.  As you can see from the pictures, I did the pork Chang Fen and the sauce was a very nice touch!

Youtube video:


Monday, October 11, 2021

Wet Chow Ho Fun (滑蛋虾河粉)


In my previous blog, I made Dry Chow Ho Fun.  Today, I made Wet Chow Ho Fun (shrimp version).

One thing to watch out for is to pan-fry the shrimps to about 70% done.  The reason being that we will need to thicken the gravy with shrimps in it at the end with cornstarch and eggs, and the shrimps will be fully cooked there.

Youtube video:


Sunday, October 10, 2021

Saturday, October 9, 2021

Red Bean Sourdough


Have some red bean paste leftover from the previous Baked Red Bean Rice Cake?  No worries, use it for a red bean sourdough.

I started the red bean sourdough the same way as a traditional sourdough bread, except before the shaping, I stretched the sourdough wide open, laid the red bean paste on top, then wrapped the sourdough into a dough ball and into the proofing basket.

There are many sourdough making videos.  I'd watched so many and made many, but, I'm listing only one below for your reference.  The red bean paste was simply my addition.  In the next few days, I'll document my sourdough journey.  For now, enjoy the red bean sourdough.  

Youtube:

Friday, October 8, 2021

Baked Red Bean Rice Cake (烤红豆年糕)


After Crispy Pork Belly and Porchetta, maybe it's time for a dessert.

Chinese baked red bean rice cake or its variants is a must for Chinese New Year or anytime you feel like a sweet dessert without too much effort :)

The youtube video below also shows how to make sweet red bean from scratch.  For people like me, a trip to any supermarket to buy a can of red bean paste would do just fine.  Yummy!

 Youtube:

Thursday, October 7, 2021

Porchetta (義大利脆皮燒肉)


After making crispy port belly for so many times, I'd wanted to try something difference.  Turn out Porchetta is very similar to the crispy port belly, except seasoned with different ingredients, rolled and tightened with cooking twine.  The main difference, in my humble opinion, is that all the skin of the crispy port belly will be crispy since it is cooked flat while only the top skin of Porchetta will be.

Anyway, it's good to try different cookings.

Youtube video: